Raspberry Hat & Green Leafy Mittens

I love this pattern! The hat is from Crochetmilie on Etsy and done in a two-row repetition of single crochets and bobble stitches. Super simple and looks amazing when done.

The first time I saw this pattern I knew exactly how I’d display the hats in our next farmer’s market. A basket of raspberries. 🙂

IMG_7474

The bobble stitch might make this pattern a confident beginner pattern choice, but if you mastered the technique of a good single crochet (the right tension, etc.), the bobble stitch will work well for you.

The green leaf mittens is a pattern I put together myself; I should probably do a quick tutorial on it. Let me know if that’s something you’d like. It has a ribbed cuff at the wrist and is thumbless – perfect for babies!

IMG_7480

If you’d like to purchase the finished product (the hat and matching mittens), it’s up on my Peanut Butter Jelliez Etsy site. Use the code WORDPRESS to get a 20% discount.

Customize Your Sneakers/Day 2/Pattern Drafting

Did I mention my Toy Story-obsessed granddaughter? Today I’m going to cut into my precious stash of Toy Story fabric to make these shoes. I’m kinda nervous about that.

I used the fabric pieces of the shoe I removed and separated yesterday as my template. I included a 1/4 inch seam allowance around the old shoe (except for the bottom) fabric. The tongue doesn’t require a seam allowance.

In addition, I cut I used the back support piece from yesterday’s cutting and made two the same width, and two double the width (and longer, which I’ll cut when I begin sewing it).

Each shoe will have two layers of fabric: the external (in my case, the Toy Story fabric) and the lining (in my case, some denim).

If your fabric is thin, you’ll want to reinforce it with interfacing; I used ShapeFlex 101 for my Toy Story fabric, which is actually a Cotton Lycra (Cotton Spandex if you’re Canadian). I didn’t use interfacing on my denim; it’s sturdy enough. The back support should have a heavier interfacing (DecorBond) or several layers of thinner interfacing.

Apply the the interfacing to the pieces of fabric that need it.

Cut two heel cups (using the original as your template) out of the same fabric you’re using for the lining.

It looks disappointingly “homemade” instead of trendily handmade, doesn’t it? From the looks of the after pictures from people who’ve completed this project, it all comes together in the next two steps. If it doesn’t, well, I guess it’ll be one of those project fails. *fingers crossed*

Day 2_Cut Fabric

That’s it! This took me under a half hour to do.

Other Posts in this Series:
Customize Your Shoes – Introduction
Customize Your Sneakers/Day 1/Prep the Shoes

Mini Muggle

I just can’t stop finding new projects for the new little granddaughter in our lives. Her parents love all things Potter, so this week I put together a romper and bonnet set for her for Easter. I might have to give it to her sooner, though.

The romper pattern is the Avonlea from Little Lizard King. This was my first sew up of a Little Lizard King pattern and I found the instructions easy to follow and the project itself was a quick sew. I chose not to use the optional bib and ruffle pieces because I wanted the fabric pattern itself to be the feature.

And the Menta bonnet. I can’t stop making these. They’re so cute and they’re fabulous scrap busters. Menta bonnets for ALL the outfits!

I really like the Menta patterns as well. I’ve got all the slipper and boot patterns, also great for scrap busting. Pairing the bonnet and/or the slippers with this romper is the perfect baby gift.

TIP: the smallest size of Menta slippers also fit 18″ dolls (American Girl, Journey, Our Generation, Maplelea).

Tamsy Time

Ok, this is one of my favorite outfits simply because it’s so easy to change it up.

Four pieces – a skirt, shirt, scarf or belt, and a tam – can be mixed and matched in a variety of ways to create different looks.

I like the full tam, skirt, scarf, shirt look to create a sophisticated school look. And I’d add to that a couple of books and a backpack.

You can find a tutorial on how to make your own books for your doll here; and a great pattern (I’ll review in an upcoming blog)  for a backpack here.

The rose and black tamsy, the candy cane tamsy, and the green and black tamsy are available while they last on Etsy.


Crocheting: The Lala Loopsy Baby Hat

I love, love, love the Lala Loopsy Baby Hat by designer Marilyn Sehn.

And so I jumped at the chance to make one for my new baby granddaughter. This was such a quick, easy project! If you have the most basic of crocheting skills you’ll be able to do this.

Stitches include the Magic Ring, single crochet, half double crochet, slip stitch – except for the magic ring, the most basic stitches you can have in crocheting.

I’ve posted a pic, but please excuse its quality. I wanted to get this up quickly so the above picture isn’t blocked or tidied, but I’ll update later with the baby attached. 🙂

Some Harry Potter for the New Wizard in Our Lives

Crib Sheets and Car Seat Cover

Christmas is over and it’s time to dig into the next big event of the year: we’ll be welcoming a new granddaughter sometime around February 15th. We’ve been waiting a long time for her, so there’s already been a fair bit of prep done.

Her nursery is decorated in circa Harry Potter. Mom and Dad are still knee-deep in painting, decorating, sorting, so pics later.

BUT. Grandma’s in full tilt HP mode.

After the Christmas sewing was finished, I dug into the requests for the new babe. I’ve been stocking up on Harry Potter prints, so I’ve plenty to choose from. For our new little wizard, I started with the basics. Crib sheets and a baby car seat cover.

I struggled a little with what fabric to use. Quilting cotton? Too rough for my baby granddaughter. Double gauze? Maybe, but what’re the chances of finding an HP print in double gauze? I finally settled on some lovely soft flannel.

For the crib sheets, you can’t beat the tutorial listed at Homedit. The step-by-step instructions are easy and the finished product, complete with french seams is super easy to make.

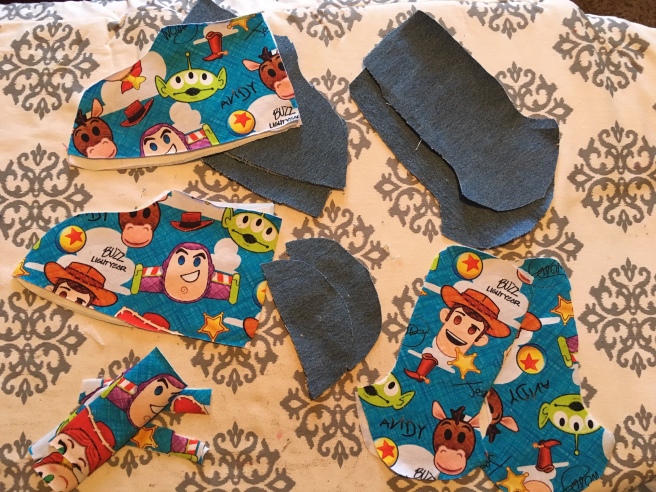
For the infant car seat cover, I used the Lullaby Line car seat pattern at Peek-a-Boo Pattern Shop. The pattern includes two options, one with a zipper closure, another with a snap closure. I made the zipper option and loved it. This project took me about an hour to make, from cutting to finishing.

Zippers are not that difficult. I promise. Up on my to-do list is a zipper tutorial for this project. I’ll update here when it’s up on YouTube.

Snaps. I added three to the peekaboo cover on the front. I use Kam Snaps purchased from Quammie Homecrafts, located in my hometown of Calgary.  Some people don’t care for the Kam Snaps, but I find them to be a quick, easy solution for quick closures on baby items. I have the occasional breakage on installation, but it doesn’t happen often.

Because Who Doesn’t Love a Sock Monkey?

Ok, the last four weeks I’ve been on a sock monkey tear. My granddaughter’s birthday is coming up and I’ve decided to theme some doll clothes and accessories for her American Girl doll (Annabelle).

At first, it was just going to be a sock monkey stuffie for the doll. But, as with so many projects, the sock monkey idea soon went wildly out of control to include these sock monkey patterned items: jacket, blanket, hat, leggings, scarf, purse … really, the ideas were coming in faster than I could buy wool for the projects.

The beauty of sock monkey is that the color scheme is so uniquely linked to … well, work socks and sock monkeys. Just using the colors will imply sock monkey so it’s easy to use a basic pattern and just alter the colors to reflect the sock monkey idea.

Of course, nothing says sock monkey like an actual sock monkey. Below are pics of some of my creations, some available on Etsy as the finished product, or as patterns (or both). I hope you enjoy the pictures (and the spirit of sock monkey) as much as I enjoyed creating these outfits and accessories for Annabelle.

Freestanding Sweater and Hat      front 2 brick background_CROPPED      thumb_IMG_0426_1024

The Heat is ON – Grill Accessories for Your 18 Inch Doll

Ok, maybe I’m a little obsessive.

After my last post on the grill out for my granddaughter’s doll to celebrate July 4th (we’re Canadian, but ANY excuse for a cookout!), I couldn’t stop looking at accessories to go with the outfits.

First step? The grill, of course. Here’s a step-by-step Youtube video on exactly how to make that grill yourself.Written instuctions can be found here.

Paper plates and cups? Find a how-to video here. Written instructions for the plates here, and written instructions for the cups here.

What’s left? Food, of course! Find the directions for a pitcher of lemonade here and hamburger (the DIY video is for a lunch tray that includes a hamburger, but I think you can adapt it for a grill). Stay tuned, I’ll be adding more as I discover them.

Edited to add: here’s another burger tutorial.

Not the crafty kind? A full up bonafide American Doll campstove and food is available here at the AG store, and you can purchase a chef’s grill outfit from Etsy.

full shot  AG Grill Outfit   full shot

Please note, we are in Canada, so allow for plenty of shipping time if you order a grill outfit for July 4th (or any other special date).

July 4th Cookout: Not Just for Humans Anymore

Eeeeeek! My sister just made a series of grill outfits (apron, chef’s hat, grill mitts) for 18 inch dolls. My favorite – and the one I’ll likely buy or steal for my granddaughter’s doll – is the featured image above.

It got me thinking about what kinds of accessories (and by accessories I mean food, grills, etc.) would be available to either buy or make. I’m big on DIY for gifts, but realistic about my skills and competencies.

Available on Etsy here is a bonafide American Girl doll grill, and at a reasonable price, in my opinion. Unfortunately, it’s only available in the United States, but the upside for American readers is that the shop does custom orders of its products. No 18 inch doll need go without her very own grill this Independence Day.

It was a little difficult to tear myself away from this shop – Lemon Bay Doll Co – which markets itself as making adventure toys for 18 inch dolls. Some seriously cool stuff here. The grill is part of the Adventures in Camping section, which also features a picnic table, a picnic basket, and – ERMAGHERD! (my daughter hates it when I say that) – backpacks and bedrolls!  I. Want.

This site also features an Adventures in Boating and Adventures in Gardening that are just gorgeous. Full disclosure: I have no idea who this person is and have never seen the shop before today, BUT I WANT TO BE THEIR BEST FRIEND.

Independence Day Designs

Ok, it seems like July 4th is still a ways off. But in the world of crafty it’s already late to be prepping for a day of this magnitude.

I’d intended to have a full range of patriotic outfits for the dolls belonging to the Littles in my life, and two months out, I think I’m close to being ready. In addition to those made for my own Littles, here are a few either available on Etsy, or soon to be up on Etsy. Enjoy!

Independence Day Dress         Shirt & Shorts